Showing posts with label Home. Show all posts

Sunday, October 26, 2014

Faux Metal Kitchen Backsplash, Paintable Wallpaper

One of the final projects that we had to tackle was the back splash behind the stove. Here's a little reference of where we began. We first tiled behind the stove back in 2005. I needed to do something because this country pink and blue flowered wall paper was very hard to clean.

Here we were a few short months ago. Cupboards were painted and the tile was quite a dark spot in the kitchen. Enter demo-man (aka my adoring husband).

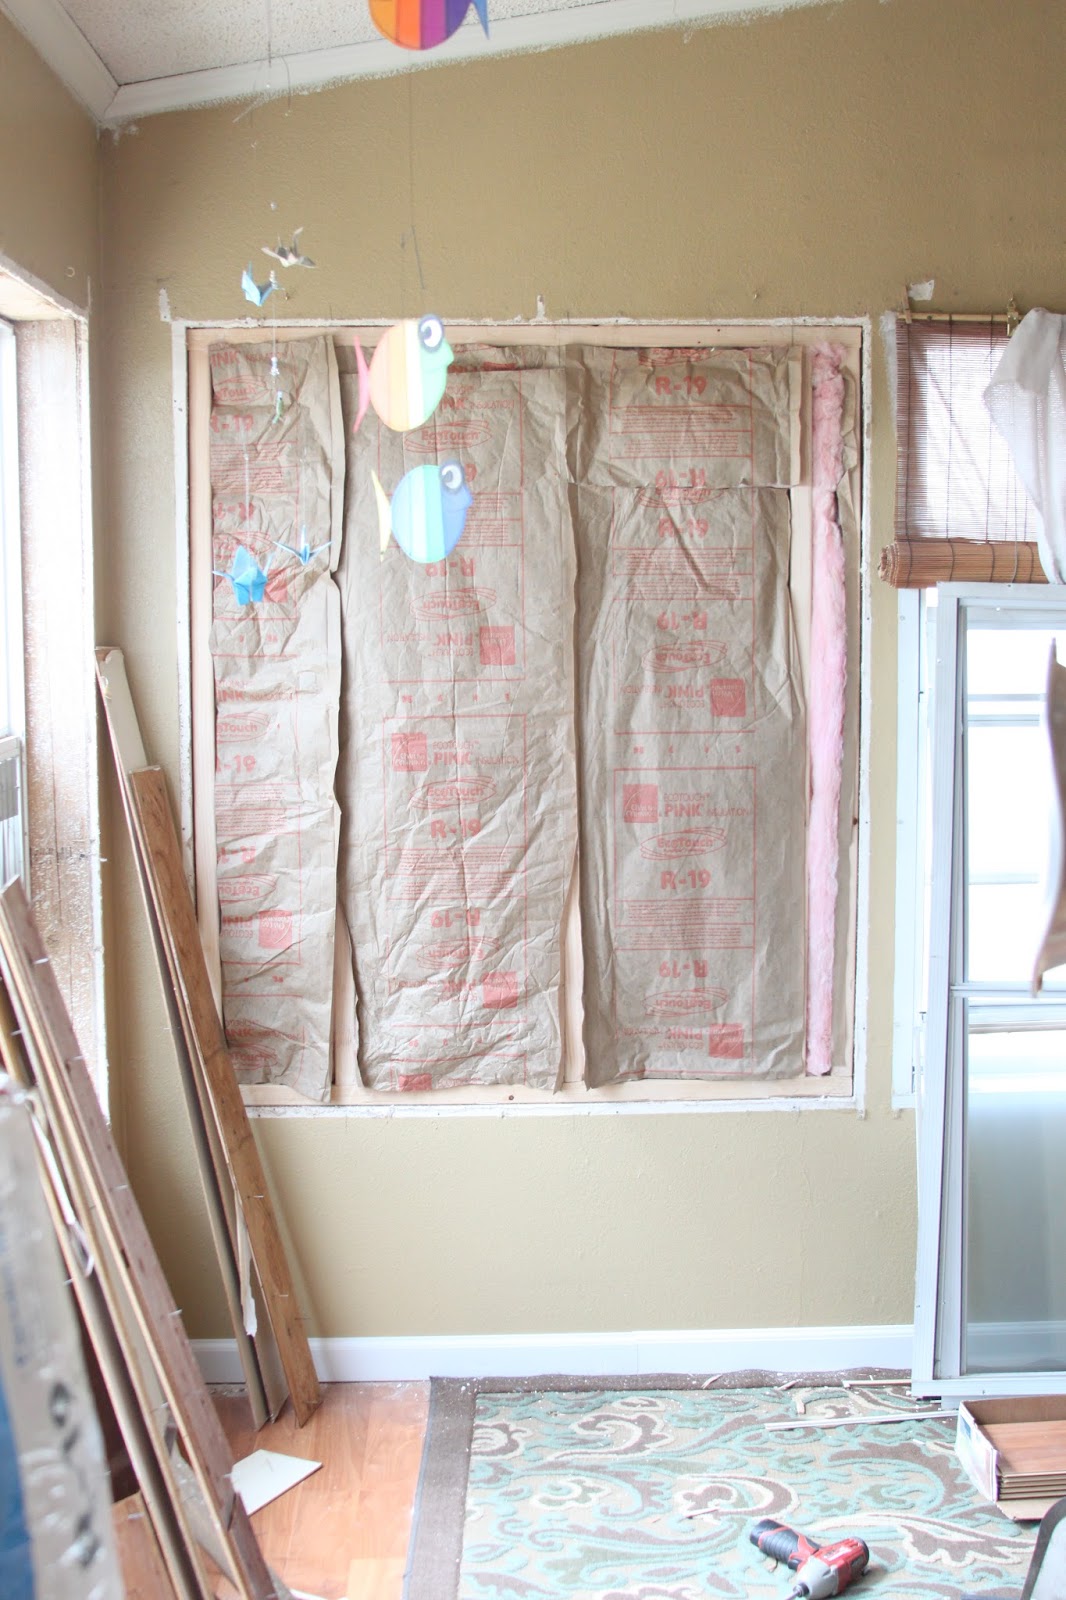
Just one, teeny, tiny problem. Removing the tile was tearing off the drywall. We ended up having to remove all of the drywall behind the stove and over to the refrigerator.

Unfortunately, I'm not sure I have a picture of just the plain wall, but here it it when we put the first pieces of  wallpaper up. Please don't judge me for still not having painted or textured the wall behind the stove. It's a great reminder of where we've come from ;)

I wanted to use what we had on hand instead of buying those faux tin tiles they carry at home builder supply stores. So, I used the same textured, paintable wallpaper that I used for my cabinet make over that you can see here. I used Krylon's Brushed Nickle Satin Spraypaint to paint the paper panels before hanging them on the wall. It's the same paint I've used on my hardware and pulls and MANY other things around my home ;). It did not take long to dry at all.

At first the seams were quite pronounced (well, they were to me, but not to Travis)

 As the day went on and the glue dried they were hardly noticeable. We also painted the cover plates and receptacles with the same spray. It may or may not hold up over time??? We aren't plugging and unplugging a lot on this wall so hopefully it will last. The metal plates are pricey.

I love how clean and streamlined it looks now. The best thing is is that if I ever want a change we won't be putting holes in the wall!!

Hope your weekend was fabulous. Stay crafty and enjoy the little things. I'm just about done with the house. I have a few more pieces of furniture to paint...including the piano (YIKES!)


Tuesday, September 16, 2014

Wood Stove Slate Tile Surround

After we ripped the carpet out of our second living area and put in the wood floors I knew that I would want a bit more tile on the floor surrounding the stoves so as not to singe the floor with embers from the fire. Please ignore the fact that my wood stove needs to a good deep clean. It gets A LOT of  use during the winter months here (awwwe look how shiny it used to be) and we've been uber busy with the remodel since February.
I purchased the slate tile from Lowe's back in 2002 or so. I'm so glad they still carry it so that I could continue with this project. In 2002, Travis hand milled the redwood mantle piece and built the raised platform with a pallet. We had a solid starting point, over the years the edge tiles in the picture above began to chip and fracture off...which is the nature of slate.  Major dilemma.

My solution was to cut the edges of the surround tiles at a 45 degree angle so that it couldn't shear off. We added tiles to the face of the platform as well as another whole run along the floor. I think that it looks much nicer now. Also, it's great to have an electrical genius as a husband. I get outlets wherever I want them :)

I found that the transition piece that looked the best between the tile and the flooring was a laminate marbled brown. It was not inexpensive, costing much more than a piece of transition wood does, but I'm glad for the splurge as hopefully it's low profile and durability will be a bonus as we trudge in wood and lug out ash in the winter.
Hope you're having a grand week. Stay crafty, or thrifty, or just plain busy.

Tuesday, September 02, 2014

Book Shelf Makeover: Divine Heirloom White

Well, here I am again. A little more progress each time I come back here and visit with you all. I purchased this bookshelf on Craigslist for $60.00 a while back. It is solid wood with solid wood shelves. One problem, it was dark and dreary and didn't match any of my other furniture.
This shelf usually holds all of my scrapbooks and doesn't look like such a major catastrophe. This is how it has been for the last few months though...while the remodel has been in progress. Heaven help us, there may be an end in sight.

I started priming it before I took the "BEFORE" picture. That's me, all gung ho and stuff. I remembered though and here it is. I don't have a garage so all of my painting either happens on my front porch or in my house...somewhere, usually the dining room. Makes for fun dinnertime conversations and maneuverings.

I really like Zinsser's NVOC Bullseye 123 primer. It seems to give the best coverage. I put on about 2-3 coats. Those crenelations on the top of the shelf were really no fun to paint...just saying. 


I did remove the doors and the hardware and painted it with my Krylon Satin Nickle spray paint. I also added 2-3 coats of Heirloom White satin finish paint. To finish off any painted piece I always use Wipe On Polycrylic. It's easy to apply, doesn't smell very much and dries pretty quickly. Much easier than varnish and doesn't cause a yellowing over time.

Here is the bookshelf in it's finished state. My albums are happy to be home (I purged about 10 games in the process) and the shelf is back in it's rightful place in the living room/office/scrapbook area. It makes me feel so much lighter. I keep all of the children's extra school supplies (paper, pencils, folders, workbooks) in the cupboard portion of the shelf.
I hope that the projects that you're working on are coming along just as nicely.
Thanks for stopping by and hopefully, some day, I'll get to start crafting again ;).

Monday, August 18, 2014

From Dull to Dynamic: China Cabinet goes Gray

 Here's where we started, back in 2011 when I purchased this bad boy from craigslist for $80.00. Well, it was $100, but we I talked him down. ;). And this is the way things stayed, for a long time. I've wanted to paint this darn cabinet for ages and I finally did it! 

Here's how the process went.
Remove retro chunky wood from front door panels. (We tried a pry bar first but that was digging into the outer frame. Next, I tried a chisel and that did the trick)

Ahhhh, already so much better.

I primed, two coats...ugh and DOUBLE ugh with these doors and the glass shelf holders


And then I painted...two coats. Not so bad on the lower part. That upper cabinet is a beast.

Next I had to decide if I wanted Earthy Gray or Heirloom White wall paper panels on the doors. I used a paintable wall paper from Lowe's. It comes in a roll and I cut it to size with and x-acto and a straight edge.

The gray won my heart. MMMMMM MMM YUM!

I painted the interior of the upper cabinet the same gray. Now, it's all put back together now and oh so handsome.
Time to finish up this room and get some window treatments now that my lovelies are all in school. Hope you enjoyed this makeover. I love the finished product. The process is getting easier too. 
Painting the bookshelf next ;)
Here is the shelf with the interior lights on at night.

Before and After

PS if you love this kind of stuff you should visit the BETTER AFTER blog. Tons of inspiration.

Monday, July 28, 2014

Remodel Update: Removing Windows

Where have I been the whole month of July you may ask. Right here and in Utah, but mostly here. Living in a house that is almost unlivable at times ;).
We finished the floors and then we decided it would be a great idea to rip out some windows...who doesn't love remodeling for months on end? Hahaha.


You find lots of  "interesting" things when you rip houses apart. Why in heaven's name would you put so many shims in between the window casing and the wall??? Holy mackerel. 
My men tearing down the siding outside. It's raining today or I'd have gotten a picture of what that looks like. You almost can't tell there ever was a window there. Awesome. We will, however, need to paint the house when we're all done with the interior.

 Window framed to wall.
Now filled in with insulation. Ready for the drywall. That won't happen until the other two windows are removed. So there's a little update and hopefully we'll get this room back in working order soon. It IS my craft area and I'm going through withdrawals. Have a happy week.

Tuesday, June 03, 2014

My Unplanned Bathroom Renovation: Grown Up Bathroom

That "If You Give a Mouse a Cookie" thing is still happening over here. With everything all topsy turvy I decided the kid's bathroom needed to be made over too. I had purchased a shower curtain on clearance for $7 I think but then the blue in their bathroom just didn't look right anymore. SURPRISE, SURPRISE ;).
Here's how there bathroom looked for A LONG time until I painted the mirror frame white and painted the cupboards white, pulled out the linoleum,tiled, textured over the wall paper, painted, and added bead board to the walls. Phew. It's come a long way.
So has my little guy.

 So, here's a picture with the new curtain, the walls still blue and the crown molding still unpainted. (Yeah, I left it unpainted all of these years even though everything else was white in there...I'm a slacker. There are no wall studs in a large span of the wall so every hook or towel bar we had would eventually rip out of the walls...four kids will do that to dry wall...even with wall anchors.

Moving on up. The trim is painted I just have to fussy paint along the wall where it meets the trim.

I am loving the new color...it's been bright blue for sooooo long. 

Our solution to the weak wall problem was to add a piece of trim along the entire wall so that we could screw it in where the studs were. Travis did such a great job milling this piece with a nice edge. I looked at Lowe's for decorative towel hooks. THEY HAVE GOT TO BE KIDDING. The cheapest one I could find there was $12.97. And it wasn't anything special. 
Next stop: HOBBY LOBBY
I found these great hooks for $3.99 a piece but they were on sale for 50% off. YAY.
Four hooks for less than the price of one at Lowe's. 
They were a dark metal finish, so I did have to spray paint them with my trusty standby
SATIN NICKLE by Krylon. Perfection. 
I measured out evenly spaced intervals and mounted them with screws. Hopefully, they last longer than the old hooks.

This owl was on clearance at Walgreens for $2. Had to have!

The mirror was on markdown at Burlington for just $9. It is a really nice piece. 

Hard to photograph the lighting but what used to be up here was U-G-L-Y! 

Found this serving plate stand at the Salvation Army for $2. Perfect to hold all of the stuff the kids like to leave out on the counter. (He went from "shaving in the first picture to Clearasil ;)) 

It's silver plated and very sturdy. 

Well, I hope you've enjoyed this little look into my GROWN UP bathroom. My boys hate it and say that they liked the blue better. Oh well, can't make everyone happy ;).
Have a great week!!!

**ONE QUESTION: DO YOU LIKE THE GRAY SPACE IN BETWEEN THE TOWEL HOOK BAR AND THE BEAD BOARD OR DO YOU THINK I SHOULD PAINT IT ALL WHITE IN BETWEEN?


Sunday, May 04, 2014

The Making and Evolution of a Fairy Garden

I was feeling pretty crummy today so I decided to do something crafty with the kids.
I've seen those fairy gardens all over the place and thought that would be a great Sunday activity to get the whole family involved in.
We started with a big rock as our fairy house (we may get something different because it was hard to come up with a roof for this one. Finding flat stones, we created a path.

Then we found some dried out stems out in the garden and clipped them down.

The fun part was finding round rocks that resembled mushroom tops. I painted them red and added white dots. The "stems" are made with round elongated stones.

It's shaping up.

This "stump" is a hollyhock stem that had a little hole in it. I glued some other stems to it for bulk.

the fence was created by cutting down dried out stems and connecting them with cross pieces.


Added in some Spanish Moss that's been in my craft area forever.
Tess HAD TO HAVE a swing. So some snipped stems and a little twine later our fairy has a swing.
 
We were wanting a stream, but this pot just isn't that big so we had to come up with a bitty pond instead. I used a little sample cup and glued flat stones all around the top of it. Added in some green and blue glass pebbles for water and called it good for now.
I think we'll add another level with a stick ladder leading from the lower pot to the upper. This is so much fun. The boys want to build a mailbox next. 
Our fairy needs a door on her house and maybe the path will be narrowed so we can plant some seeds alongside it. Hope your weekend was wonderful. 
Stay crafty my friends.